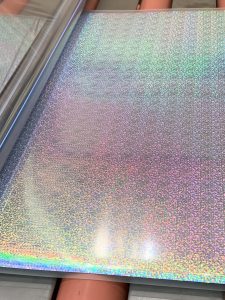
Foil printing is a technique where we stamp a thin coat of metallic foil to card or paper. You do this using a combination of pressure and heat. Other names for it include blocking and stamping. We have a lot of experience with it, so we can deliver the best foiling services in the UK.
This practice often gets used for products like invitations and date savers. It is also possible to employ it for commercial printing. Businesses can gain a sophisticated, luxurious, or classy finish for their goods. It can aid your print with standing out from the rest.
To prepare your own work for foil printing, you’ll need to follow certain steps. We’re going to discuss them here so you know what to do.
Plan the design
 The first step is designing. It is the most important one of all. Start with a sketch or two. Show it to people to get some feedback. Also, ensure your design abides by your brand guidelines if you’re part of a company.
When preparing, it’s important that you adhere to certain guidelines. One of them is keeping things simple. The simplest designs are often the better ones. Yours needs to complement the foil print and let it stand out.
Avoid overusing foil too. You’re better off not covering the whole print. Instead, be selective if you want to make an excellent first impression.
Do your research as well. Take inspiration from available examples to see what you can do with your materials. Talk to us if you need the UK’s leading foiling services.
Create it
The next step is to create your design. Decide what you’d like it to be and elements you want embellishing on a foil stamp. You can then bring your concept to life utilising some kind of image editing software.
Firstly, you must create the basic design you want to use during printing. At this phase, you must finalise every basic element. Elements like the product’s size and whether you want round or straight corners need implementing at this stage. You’re going to need to set up your product for the primary design.
Choose elements for stamping
With the third step, you need to pick the elements you want to stamp. Take your design as your guide and can start creating it so it’s ready for foil printing.
Here, you need to create two individual parts. Firstly is for part of the design that you want stamping. The other needs to be with all the other elements of your design. You can set this up as an extra layer in your design document. Alternatively, you can put the individual elements into individual documents.
As long as every element is a precise replica of where you want it put on the main design, it will function as a perfectly usable template for printing.
Convert your design into a spot colour
When you’ve set all your elements up, you must convert them into a spot colour. It is also necessary to convert the colour mode into CMYK to make it ready for print. That can guarantee that the same colour on screen will be the one you get in the final print. It needs to be a 100% colour that lacks tints.
Label every element
Before you send the final design to the printer, see to it that you’ve clearly labelled your elements. For those working with layers, save every one with a suitable name. Inform the printer of what layers are for each part of the design procedure. Then, you can display and hide them as necessary.
We offer world class results with our foiling services
At Foiling Services, we use our talents to provide our clients’ items with more distinguished, attractive, and vivid looks. By working with us, you’re giving yourself easy access to all of foiling’s excellent benefits. The work you can expect from us will be nothing short of world class.
So, please contact us if you’d like to use our foiling services. We’d be happy to offer them for any project.
